Email Development
A Beginner’s Guide: Fix HTML Issues in Campaign Precheck
If you’ve ever experienced that nagging feeling like you’ve missed something—maybe a link, or HTML that may not work on every email client—we know just the tool. Campaign Precheck is Email on Acid’s newest feature to add to your email workflow for getting your messages production-ready. It alleviates send anxiety by reviewing the setup of your email step by step, including the HTML.
July 25, 2019 update: Since this blog’s publishing, Campaign Precheck now includes a section on Deliverability with blocklist checks and spam tests. You can read more about it here.
Getting Your Code into Campaign Precheck
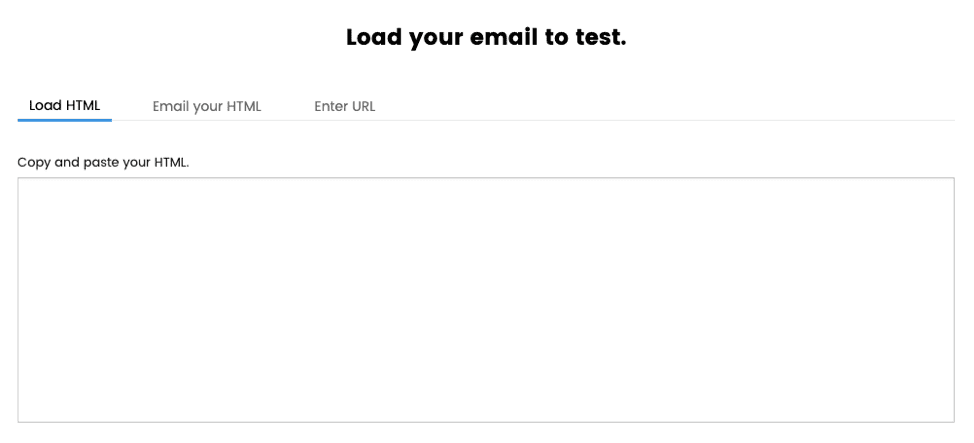
There are three ways to get your code into Campaign Precheck:
- Copy and paste the HTML
- Email your HTML directly to your Email on Acid account Inbox
- Click on ‘Email your HTML’ and copy the email address for your account. Send a test live from your ESP or test system and find the email in your account Inbox.
- Enter URL
- If you have hosted your email HTML or have a ‘View online link’ you can copy and paste the URL into the box and Email on Acid will grab the code for you.
Subject and Preheader Preview
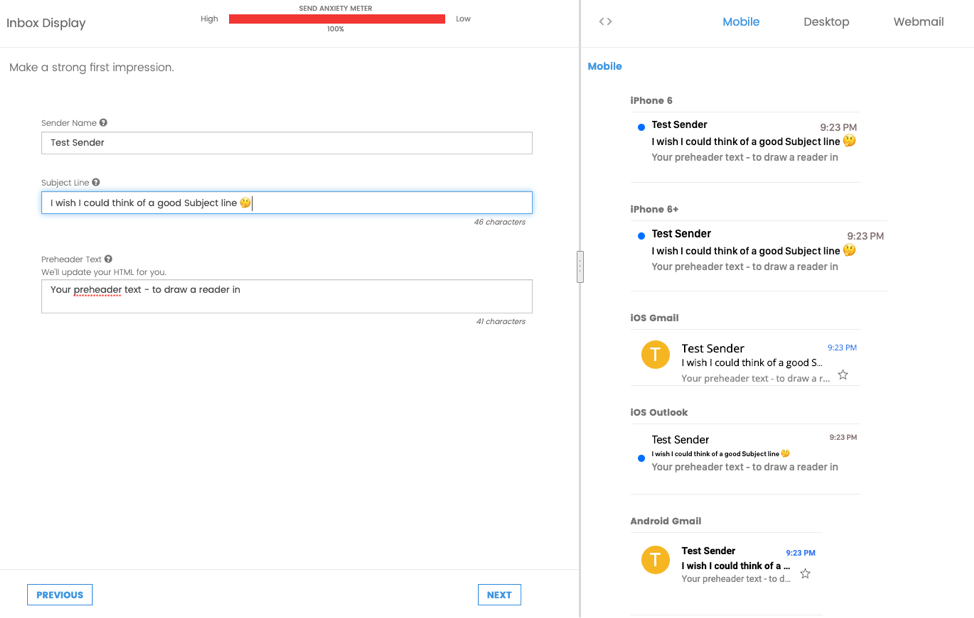
First things first, be sure to test out how your subject line will look on a range of clients. Toggle between devices to check for any unfortunate shortening—we have all seen some dodgy email displays in the inbox. Use this step to ensure the preheader looks exactly how you want it to. Don’t worry if you haven’t coded a preheader into your HTML file! Email on Acid will automatically populate your preheader snippet of code across clients. This allows your preheader to display in the inbox, but not in the email itself once the reader opens it. Campaign Precheck automatically adds the following code straight after the <body> tag:
<span style="display:none !important;visibility:hidden;mso-hide:all;font-size:1px;line-height:1px;max-height:0px;max-width:0px;opacity:0;overflow:hidden;">Your Preheader Text</span>
<span style="display:none !important;visibility:hidden;mso-hide:all;font-size:1px;line-height:1px;max-height:0px;max-width:0px;opacity:0;overflow:hidden;">
<!--EOA COMMENT: This snippet of white space has been added to ensure short preview text does not run into the following text of your email.-->
</span>
The nitty gritty
Email clients find the first bit of text directly after the tag to give email recipients a clue as to the content in the email. A good preheader message can really increase email open rates, especially when in conjunction with a recognised, trusted sender name and well-crafted subject line. The first part of the code is adding a tag around your preheader text, along with a range of inline styles to hide the text once the email is opened: style="display:none !important;visibility:hidden;mso-hide:all;font-size:1px;line-height:1px;max-height:0px;max-width:0px;opacity:0;overflow:hidden;" followed by “Your preheader text” and a closing tag. The next has the same styles but is filled with the HTML characters (non-breaking space) and ‌ (a zero-width non-joiner). This pair ensures that the text directly after your preheader, usually a ‘View online’ or ‘Unsubscribe’ link or ‘Dear %%FIRSTNAME%%’ do not populate in the preheader, and instead create a white space big enough to hide it from populating in inboxes. After completing this step and clicking next you are greeted with a ‘High Five!’ These little progress reports let you know what you have completed and what’s coming up
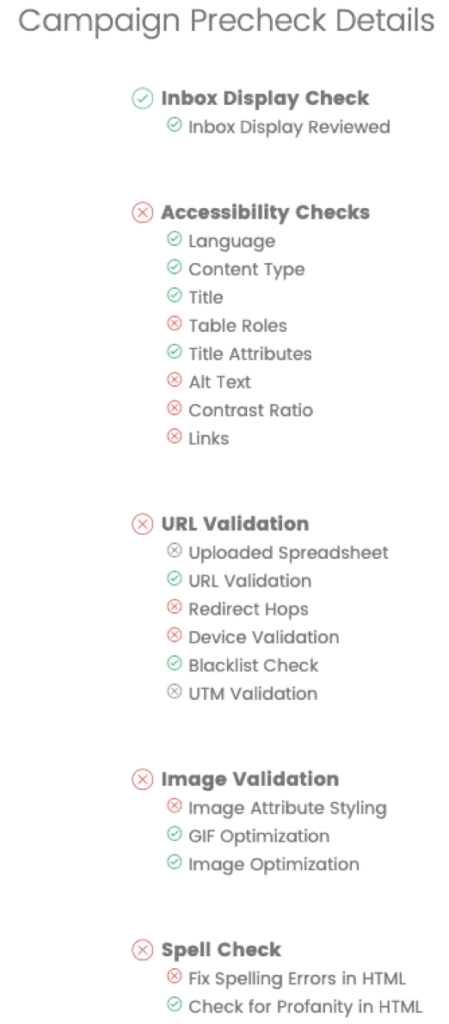
If you leave out a section or don’t quite make all the changes, Campaign Precheck will also let you know:

Setting up your Code for Screen Readers
According to the World Health Organization (WHO), 1.3 billion people worldwide live with some form of visual impairment, with 217 million living with moderate to severe vision impairment. Approximately 36 million people worldwide are blind. Chances are, at least a small portion of your email subscribers use a screen reader, which is why emails need to be optimized for them.

Email title
An email title lets the reader know what is coming up. All screen readers start with the title, so it is imperative to include it in your HTML for good accessibility. If you haven’t included a title, Campaign Precheck will add the following line of code directly after the <head> tag: <title>YOUR_EMAIL_TITLE</title>
Content type
All files sent online are decoded at the receiving end. To make sure your message comes out looking correct, having all the correct HTML characters and special letters, the content type needs to be set. From the dropdown choose the correct content type for your message – the most common is UTF-8. This has the most support for languages and symbols, whereas ISO-8859-1 does not support as much, but may be needed for some markets. If you don’t have the content type set up in your HTML, Campaign Precheck will add: <meta charset="UTF-8"> or <meta charset="ISO-8859-1">
Language
Screen readers need to know which language your email is written in. This will determine how it will be read on a screen reader and can also affect how some characters are loaded in an email. This video demonstrates the language being properly set, and this one demonstrates the opposite. By choosing the correct language from the dropdown, Campaign Precheck will add lang=”en” to the end of the first <html> tag. For example, <html lang="en"> or <html xmlns="https://www.w3.org/1999/xhtml" xmlns:v="urn:schemas-microsoft-com:vml"xmlns:o="urn:schemas-microsoft-com:office:office" lang=”en”>
Presentation roles for screen readers

The most common way to code an email is with tables. If you code with tables, the presentation role attribute enables screen readers and other tools to display and read the content correctly. If you are using a table to create the layout of an email and not as a table full of data, like a spreadsheet, then adding role=”presentation” will ensure the content is read correctly. Without the presentation attribute, a screen reader could read the contents as: “Row 1, Column 1, logo, Row 1, Column 2, Headline text… “ This doesn’t make for a great user experience. Campaign Precheck finds all the <table> tags in your HTML document and whether it has role=”presentation”, you can click ‘Add roles to all’ to do it quickly or go through one by one. Campaign Precheck only adds role=”presentation” to your table tags and does it before the closing >
Remove title attribute from images

The editor will remove the title=”Image title” attribute to stop it being read twice, as alt text and title attributes are both read on a screen reader. The title attribute adds a tooltip to images that are not needed when alt attributes are included. Campaign Precheck also has a ‘Remove titles from all’ button for automatic fixing.

It is vital to include the alt=”” attribute on all <img> tags, not only for accessibility reasons to ensure screen readers can read the image description, but especially in email HTML. Reason being, some email clients and recipients have images blocked, or slow speed areas may hinder image loading and will need the alt tag to tell them what the picture is. That’s why it’s crucial to write appropriate image alt text in email. Campaign Precheck adds the alt tag just before the closing > on an img tag. For example:
<img src=”https://via.placeholder.com/600x400” width=”600” height=”400” style=”display: block;” alt=”Placeholder Image” >
Contrast ratio
Contrast ratio looks at the difference between the text color and background color. Here’s a little guidance to finding the correct color scheme in every email, and design tips for a heightened user experience. Campaign Precheck reads the colors and gives the ratio. If it is below 4.5:1, then it can adjust the color shades to ensure the contrast is high enough.
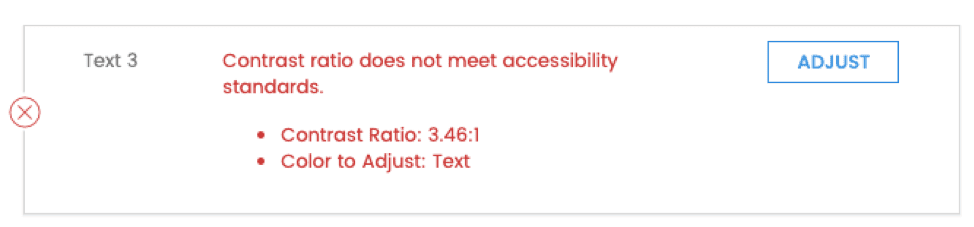
When the color is adjusted, you can stipulate a color in your HTML element, such as a <td>. If you don’t, Campaign Precheck will simply add a span around the text with an inline CSS color style and text decoration: none;. If you have a color: inline style already, it will simply replace the color code.
Underline links
For accessibility, make sure to underline links and CTAs so a reader can easily spot them in the text. This is a design consideration for most, and often, as email developers, we try to hide the automatic underline and blue coloring on a CTA. However, some links, especially those within body copy or large sections of text, it’s best to simply underline the link. Campaign Precheck will add style=”text-decoration: underline;” to links or will replace text-decoration: none; if an underline is already present.
Validate your URLs and UTMs
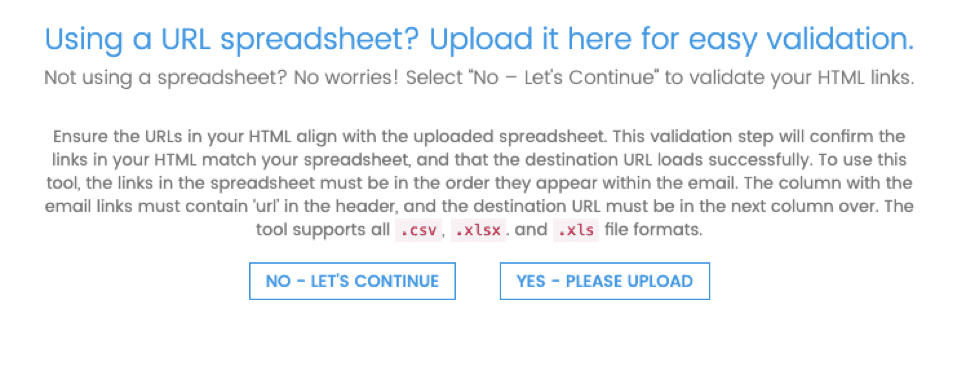
A handy tool to set your mind at ease, you can check every link and ensure they all work and take the reader to the correct destination. Just before going into the URL check, Email on Acid prompts you to see if you have a spreadsheet with all of your link information already. That way, it can check against the HTML. No worries if you don’t, as the next page will highlight all of the links.
The URL validation then runs through every link in the email and provides you with its findings. Scroll through the results to see that each has a green checkmark.

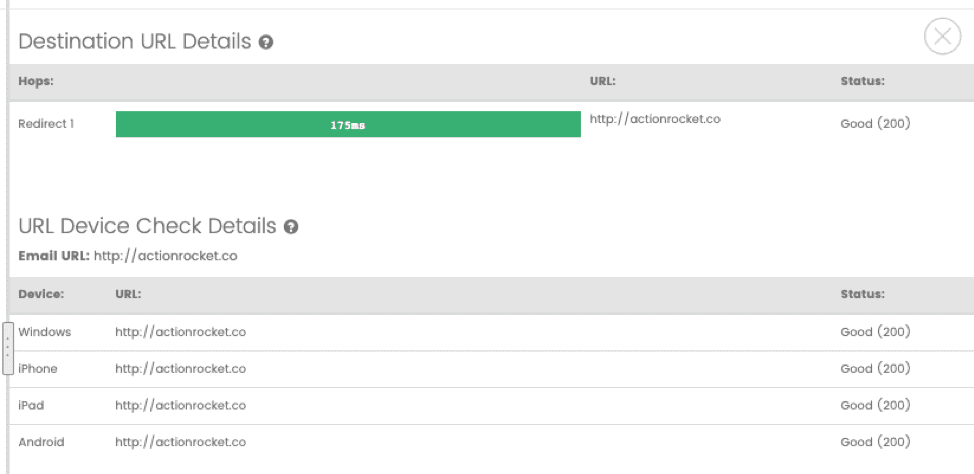
The little green tick means it is a valid URL. To double check, you can click on the preview button and it will open the link in a new tab. You can check out the details as well:
UTM parameters
You can add and edit Google UTM link parameters in Campaign Precheck to make sure you haven’t missed any, or accidentally added a bad character or duplicated a link.
Tip: make sure you have the same UTMs on every link, especially if you’re using template content blocks. It’s common to accidentally have UTMs from a previous campaign in there.
For the sake of example, let’s say you’re sending a newsletter via email promoting a SUMMERFRIDAY discount code. Your UTM parameters might look something like this:
- The source field is the referral traffic source, such as newsletter, twitter, Google.
- All links will amend with ?utm_source=newsletter.
- The Medium field is the media type or marketing channel, such as email.
- All links will amend with &utm_medium=email.
- The Campaign field is the product, promo code or slogan
- All links will amend with &utm_campaign=SUMMERFRIDAY.
You can also add additional parameters with unique term and content parameters to measure individual URLs:
- The Term field is the main keyword or description of the link
- Campaign Precheck will amend &utm_term=logo to all links.
- The Content field the type of link or position
- Campaign Precheck will amend &utm_content=firstlink to all links.
Image Validation
There are two main items Campaign Precheck checks for in order to validate your images. It first checks the src URL, which ensures the image will actually populate. Then, it looks for the width and border image attributes. All email clients need to know the width of your image. They can automatically workout the height, but you can add it as an extra precaution here if you’d like. Second, you need to have your image border set to “0” to prevent any lines from surrounding images. Campaign Precheck amends the HTML width=”” and height=”” attributes on an <img> tag or adds them if they are missing. It also adds border=”0” if this is not present.
Keep in mind: Amending the height does not amend any CSS inline height styles, including height: auto;. Amend any and all heigh attributes that need it.
Within Campaign Precheck, you can also optimize gifs and images. If all of your images are under 200kb, it will give you a congratulations!

Run a Spell Check
Another handy part of Campaign Precheck is the Spell Check step. This runs through all text in the email and can make individual changes, or if you have continually misspelled a word throughout, it can correct them all with one click.
Campaign Precheck Summary
After you’ve gone through each step, you’ll see a summary report that tells you what was completed and if there’s anything you missed! If you need to go back, you can quickly skip back through to make any other updates to your email.
Final Checks

Lastly, you can click to download all of the created assets, amended HTML and optimized gifs and images. Next to the Download Assets button is an Action button. This is where you can send yourself or your team a test email to ensure any changes you made are okay. Easily download your Campaign Precheck Summary, or view code changes side-by-side to double check that all code changes are correct.

See for Yourself
Hopefully after running through Campaign Precheck, your send anxiety is completely gone (well, about the HTML and email design, anyway) and you are ready to hit that send button with confidence. Campaign Precheck is continually evolving and Email on Acid is adding new features all the time. As always, send any suggestions you have to them on on Facebook, Twitter, the #emailgeeks slack channel or customer support.


