Email Development
Pseudo-Elements: Why You Need Them and How to Use Them

Ditch the boring emails. Pseudo-elements will make your messages pop with easy styling and interactive options.
If you don’t know what pseudo-elements are, that’s alright.
In this article, we’ll start with some pseudo-element basics, including syntax and usages. Then, we’ll take you through four different ways to use pseudo-elements to superpower your emails.
A pseudo-element is a keyword added to a CSS selector that you can use to style a specific part of an HTML element, like a paragraph or a header. With the help of pseudo-elements, we can change the style for the first letter of a paragraph or insert a button after a paragraph.
For instance, we can use a CSS selector p to specify the HTML paragraph element. Then, we can add a ::first-line pseudo-element to the CSS selector to style the first line of the paragraph. Check out our post for a refresher on CSS syntax.
Here’s a table of all CSS pseudo-elements, example usages with a CSS selector p, and their uses.
| Pseudo-element | Example | Description |
| ::after | p::after | Inserts something after the content of each <p> element |
| ::before | p::before | Inserts something before the content of each <p> element |
| ::first-letter | p::first-letter | Selects the first letter of each <p> element |
| ::first-line | p::first-line | Selects the first line of each <p> element |
| ::marker | ::marker | Selects the markers of list items, such as a bullet point or number. Note that this pseudo-element does not require an HTML selector. |
| ::selection | ::selection | Selects the portion of an element that a user selects. Note that this pseudo-element does not require an HTML selector. |
In this blog post, we’re going to focus on three pseudo-elements:
- ::first-line
- ::first-letter
- ::after
You’ve probably come across the term pseudo-class while learning about pseudo-elements. But what are they?
A pseudo-class is a keyword added to a CSS selector that defines a special state of the selected HTML element. For instance, a pseudo-class like :hover specifies the hover state of a paragraph element and applies stylistic changes, like changing the color of the font when the user hovers over the paragraph.
On the other hand, a pseudo-element is a keyword added to a CSS selector that applies styling to a specific part of an element, such as applying CSS to change the first letter of a paragraph element.
We’ll use the :hover pseudo-class in conjunction with the pseudo-element ::after in some of our tutorials below.
Before we dive into the nitty-gritty, let’s look at where the three pseudo-elements we’ll use in this tutorial do and don’t work. Each email client supports different types of pseudo-elements, as shown below:
| ::after | ::first-line | ::first-letter | |
| Lotus Notes | ✕ | ✕ | ✕ |
| Outlook Desktop | ✕ | ✕ | ✕ |
| Outlook Mac | ✓ | ✓ | ✓ |
| Thunderbird | ✓ | ✓ | ✓ |
| Samsung Native Mail app | ✓ | ✓ | ✓ |
| Gmail App iOS/Android | ✕ | ✕ | ✕ |
| Apple Mail | ✓ | ✓ | ✓ |
| iOS Mail | ✓ | ✓ | ✓ |
| AOL | ✕ | ✕ | ✕ |
| Gmail | ✕ | ✕ | ✕ |
| Google Apps | ✕ | ✕ | ✕ |
| Outlook.com/Office 365 | ✕ | ✕ | ✕ |
| Yahoo! | ✕ | ✕ | ✕ |
Remember to cross-reference this support table with your subscriber base to make sure your users can see the pseudo-elements in your enhanced emails.
Now we’re ready to dive in. Let’s start by learning the proper syntax for pseudo-elements. Check out the pseudo-element syntax in the code below:
                                selector::pseudoelement {
    property: value;
}
First, we input a selector, like <p>. Then we enter a pseudo-element, like ::first-line. Within the curly braces {} we input the property we want to style, like font-weight and assign a value to this property, like bold. With the following code snippet, we can bold the first line of a paragraph:
                                p::first-line {
    font-weight: bold;
}
If you’re familiar with CSS2 and CSS1, you’ll notice that the original single-colon syntax :first-line was replaced with the double-colon notation ::first-line in CSS3. The single-colon syntax is now reserved for pseudo-classes.
With these basics out of the way, we’ll walk through four ways pseudo-elements can enhance your emails.
Let’s start with something simple. We’ll use the ::first-letter pseudo-element to add some style to our emails. This pseudo-element lets us change the first letter of an HTML element, like a paragraph:

We’ll do this with the following code:
                                p::first-letter {
    font-family:Courier, serif;
    color:#007700;
    font-weight:bold;
    font-size:24px;
}
First, we specify the CSS selector p for the paragraph element. Then, we use the pseudo-element ::first-letter to specify that we want to apply the following stylistic changes to the first letter of each paragraph. The content between the curly braces {} specify the CSS font and text properties we want to apply. In this case, we’re making the first letter of each paragraph larger, bold, and green.
Just as we can use the ::first-letter pseudo-element to change the first letter of a paragraph, we can use the ::first-line pseudo-element to style the first line of some text. This styling will automatically adjust to the width of the first line, as shown below:
First, we wrapped our text with a div element with the class typography, <div class = typography>. That way, we can target our text with a pseudo-element. Then, we’ll use the code below:
                                .typography::first-line {
    font-family:Georgia, serif;
    font-style:italic;
    font-size:24px;
    line-height:30px;
}
First, we specify the CSS selector typography to target the text we’ve wrapped in a div element above. Then, we use the pseudo-element ::first-line to specify that we want to apply the following stylistic changes to the first line of the text. The content between the curly braces {} specify the CSS font and text properties we want to apply. In this case, we’re italicizing the first line and making it bigger to make it pop.
Now that we’ve tackled the basics, let’s try something a bit harder. Below, we’ll go through how you can use the ::after pseudo-element to add interactive elements to your emails.
That’s right, you don’t need Javascript to add interactivity to your emails! In fact, we don’t recommend using Javascript in email development, since it’s not supported in email clients and can be flagged as suspicious activity.
You can use buttons to redirect traffic from your email campaigns to your website. Below, we’ll create a button and then apply some styling when we hover over the button.
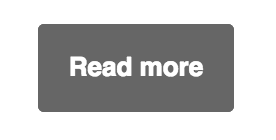
We’ll start by creating a static button with the following code to create a basic button:
                                <table role="presentation" cellspacing="0" cellpadding="0" border="0" align="center" style="margin: auto">
    <tr>
        <td style="border-radius: 3px; background: #666666; text-align: center;" class="button-td">
            <a href="https://www.google.com" style="background: #666666; border: 15px solid #666666; font-family: sans-serif; font-size: 13px; line-height: 1.1; text-align: center; text-decoration: none; display: block; border-radius: 3px; font-weight: bold;" class="button-a">
                <span style="color:#ffffff;" class="button-link">Read more</span>
            </a>
        </td>
    </tr>
</table>
This will create a static button, as shown below.
Next, we’ll use the pseudo-class :hover to apply some CSS properties when your users’ cursor hovers over the button.
We’ll do this with the following code:
                                .button-td:hover,
.button-a:hover {
    transition: all 300ms ease-in;
    background: #333333 !important;
    border-color: #333333 !important;
}
In the code above, we tell the button that we want to apply changes when the user hovers over it. We apply CSS properties to change border and background color with a transition time of 300 milliseconds:
Finally, we’ll use the ::after pseudo-element to add some text after the user hovers over the text:
                                .button-a:hover::after {
    content: " >>";
    font-size:13px;
    text-decoration: none;
    color:#ffffff;
}
The code above tells the button that we want content after the user hovers over the button. We use the content property to add two arrows >> after the current text. We’ve also applied CSS styling for the arrows:
Besides driving traffic to your site, you probably want to collect data on your email subscribers’ feelings about your product. We’ll use the ::after pseudo-element to capture user feedback below.
Let’s start with an image with three smileys:
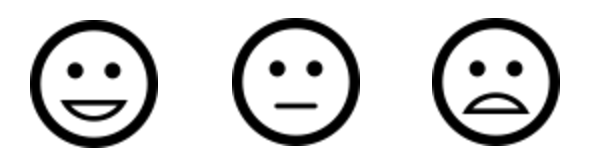
Next, we’ll use the :hover pseudo-class and the ::after pseudo-element apply CSS properties to the smileys when the user hovers over the icon:
                                .icon1:hover::after{
  content: "Love it!";
}
.icon2:hover::after{
  content: "Meh!";
}
.icon3:hover::after{
  content: "Hate it!";
Like the code for the button tutorial above, here we used :hover and ::after to add content to the icons when a user hovers over them. We specify in the content property the text we want to display after users hover over an icon:
We used the ::after pseudo-element in conjunction with the :hover pseudo-class to create interactive icons to capture user feedback.
You can use this as a launchpad to get started, but you’ll still need to build a web page to display a thank you message after capturing feedback to make this feature fully functional. You’ll also need a method to track how often users click each icon to collect user feedback.
And that’s it! Now you know what pseudo-elements are and how to use them to enhance your emails. Before you start, remember to check the support table above to make sure pseudo-elements are compatible with your subscriber base.
We know how important it is to test any new email-development technique before deploying your changes to production. At Email on Acid, we have you covered. We offer everything from email testing to email analytics, as well as a whole bunch of handy resources like coding tips and free templates. Sign up today to take your email game to the next level!
This post was updated on February 25th, 2022. It was also updated in January of 2020 and originally published on December 9th, 2016.


