Email Development
Notes from the Dev: Coding Interactivity for Event Email Marketing

Interactive emails can be intimidating for many developers. That includes me. It can seem a little scary because of the uncertainty. How much extra coding and time will it take? Will email clients support the interactive code? How many of our subscribers will actually be able to experience it?
Those are all great questions to ask yourself before you put all that effort into developing an interactive email. But here’s the truth… It doesn’t have to be hard and it’s not all that intimidating either.
I put together my very first interactive campaign for Email Camp 2022 (Maybe you remember seeing it). In this episode of Notes from the Dev: Video Edition, I’m rolling solo, breaking down that email code, and showing you how some basic interactivity adds value to event email marketing.
Check out the video below to find out how easy it is to get started. Then, keep reading to get some additional tips and code snippets from this campaign.

About the interactive email campaign
As we got closer to the big event, we wanted to drum up excitement for Email Camp and increase attendance. What better way to do that than to surprise and delight our subscribers with some interactivity?
Email campaigns for event marketing often include a lot of information, especially if there are multiple days with lots going on. For last year’s Email Camp, we had two days with distinct tracks for learning: one geared toward marketers and one focused on email development.
I decided to use interactivity to highlight and hide content for two inbox experiences: One that highlighted speakers and presentations on Day One and another for Day Two.
Email Camp Day 1 Speakers
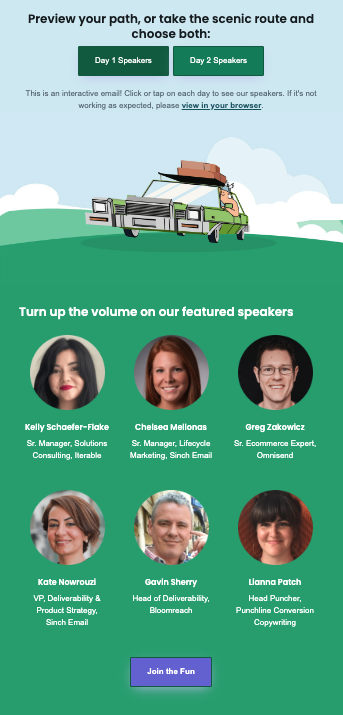
Email Camp Day 2 Speakers

The point is, we didn’t throw in interactivity just to look cool (although that’s a nice bonus). We had the goal of increasing event signups and clearly communicating even details for two different audiences.
Experience it for yourself! Check out my interactive event email in your browser and then find out how it works.
Coding the interactivity
When I started coding this email, I created a shell using components from our email design system. That meant the basics were up and running really quickly, which allowed me to focus on the interactive portion of email development.
However, the look of this email is significantly different than normal campaigns for our brands. For example, we used uncommon colors that reflected the Email Camp theme. So, rather than making changes to the email design system just for this campaign, I exported the shell and made my own tweaks outside of the defined system.
I chose the tried-and-true punched card coding method to add interactivity to the campaign. This approach uses form inputs to display or hide different elements. In this case, it is radio inputs, <input type="radio">, that highlight buttons and display specific blocks of content.
Fun fact: They’re called “radio buttons inputs” because they’re named after the preset buttons that let you jump right to your favorite stations on a car radio.
Everything is contained in one label, and we start nesting things from there. This ensures that the input works in the AOL and Yahoo Mail clients. It’ll also work great on Apple devices. I’ll explain how we handled Gmail and Outlook a bit later.
How do the radio inputs work?
With radio inputs, only one option can be selected at a time. You’re probably used to seeing them as small, empty circles, and the one that’s selected is filled in. However, we can also use radio inputs to display or hide different content in an email, depending on which input is selected.
You’ll need one of your radio inputs marked as checked so that certain content is already displaying. In this email, we wanted to show Day One speakers and events by default, but recipients could click the Day Two button to see other speakers and then toggle back and forth between the lists for each day.
Day One radio input is pre-checked:
                                <!--[if !true]><!-->
<input type="radio" name="day" id="day01" hidden="" checked="" style="box-sizing: border-box; mso-hide: all;">
<!--[endif]---->
Day Two radio input is not checked:
                                <!--[if !true]><!-->
<input type="radio" name="day" id="day02" hidden="" style="box-sizing: border-box; mso-hide: all;">
<!--[endif]---->
The hidden=" " inside the input keeps the actual radio button (or that little circle) from displaying, which would look a little strange. You’ll want to keep the name of the input consistent, so everything works. And of course, use a unique id for each input.
As long as all your nesting is correct and the rest of your HTML is set, this code is all the CSS you’ll need and you’re good to go:
                                #day01:checked~.day01,
#day02:checked~.day02 {
display: block !important;
}
#day01:checked~.btn-eoa-primary,
#day02:checked~.btn-eoa-primary {
background: #086546!important;
}
#day02:checked~.disclaimer {
display: none !important;
}
The CSS above includes a checked pseudo selector for both days. This allows the id to see if an input is checked. If it is, it will put display: block in your class. That’s what allows us to hide and show information in this interactive email campaign.
Dealing with Outlook and Gmail
Unfortunately, the Outlook and Gmail clients did not support this interactive piece. So, I needed to come up with some CSS classes specific to those two clients that simply show the Day Two speaker content underneath Day One. The classes also hide the section of the email that includes the interactive buttons and related copy.
Now, it’s true that we could have used AMP for Email to add this kind of interactivity for Gmail users. But, as you might find when developing interactive email content under a tight deadline, it just wasn’t feasible this time.
When you’re developing an interactive email, you obviously need to think about how to code the interactivity, but you also need to think about fallbacks. But even if there are fallbacks, you may still want subscribers to experience the campaign as you intended. Or, there could be some other unforeseen reason that the email interactivity didn’t work.
That’s why it’s a smart move to add a quick disclaimer or notice to interactive emails. Since interactive emails are still pretty uncommon, this alerts subscribers that there’s more to be found. And if the interactivity is unsupported or isn’t working, you can direct them to click a view in browser link.
Start experimenting with interactive emails
Event email marketing isn’t the only way to use this interactive email technique. Think of some other purposes for hiding and showing content with an interactive email.
For example, an ecommerce promotion could have buttons to select different product categories inside an email. Or an email newsletter that’s packed with content could allow subscribers to toggle between topics and find what interests them.
If you’re looking for another way to add interactivity to an email campaign, check out Jay Oram’s Email Camp presentation on how to add click-to-reveal modules. You can also sign up for updates on Email Camp 2023 – coming this fall.
I had a ton of fun coding my first interactive email and I’m super happy with how it turned out. So, you can expect to see more in the future! And keep watching Notes from the Dev for new ideas. Be sure to subscribe to our YouTube channel and you’ll never miss an episode.


