Email Development
How to Code Search Bars in Email

With support for form entries across most email clients, it’s worth exploring how to code search bars in email. Adding this unique module will hardly require extra work from your web team. A search bar adds an interactive element to an email and allows subscribers to search your website from their inbox!
HTML Elements
To add a search bar that works in our HTML emails, we need to use the <form> and <input> HTML elements. These are not supported in all clients and are only partially supported in others. However, only Outlook Desktop app and Outlook.com don’t support the search bar we are creating here. But of course, that’s what MSO conditional statements are for.
Throughout this example we will use the Email on Acid blog search as the basis, but this technique can work on almost all websites with a search box.
The basic form

                                <form action="https://www.emailonacid.com/blog/" method="get">
<input type="text" name="s"/>
<input type="submit" value="search" />
</form>
First, we open our <form> and define the action, which is essentially linking the email to the webpage the search is hosted on. In this case, action="https://www.emailonacid.com/blog/". Next, we choose the request method so that all the information we input into the form is sent to the webpage.
A word on request methods:
The two most popular methods are POST and GET. POST requests supply additional data from the client to the server, and may need to be used for some websites. They are normally used to send hidden requests and sensitive data, such as passwords. The GET method creates a URL from the search input (we’ll go into that in a bit), which makes it easy to see what is being searched for on the website.
Back to the basic form
When searching on a webpage, it is fine for the data to be seen since in most cases it isn’t sensitive data, just a string of keywords. Therefore, GET is the perfect method for our in-email search.
Up next are our <input> fields. You can get fancy here by adding multiple fields or keep it as simple as you want. For our purposes with search bars in email, you only need two fields.
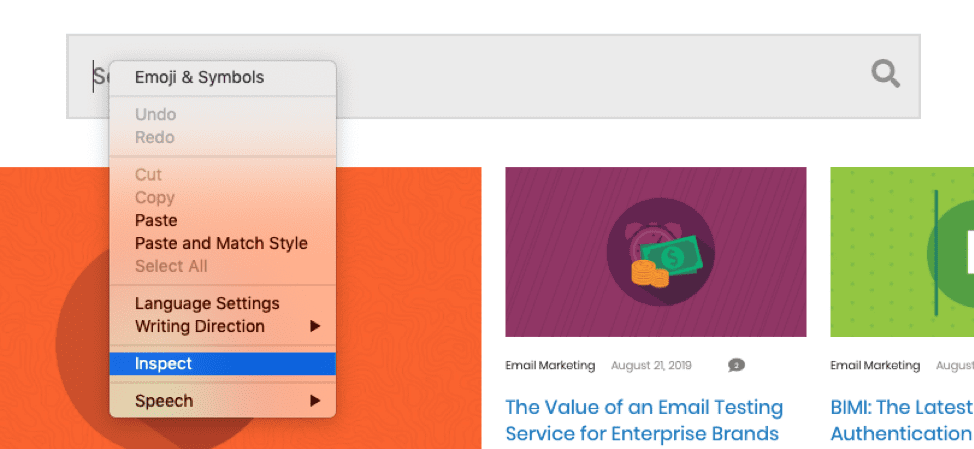
The first field is the text input, where a user will type into the search box. This is set by adding type="text" to the input field. Next is the input name, which is set to match the input field on the webpage you are searching on. To find that out, we can use the Chrome developer tools (or whichever browser you use). Right click on the webpage’s search bar and select Inspect to find all the attributes the search bar has:
You’ll see a highlighted snippet of HTML with all the attributes:

We only need the name here: name="s"
The next field is the ‘Submit’ button: <input type="submit" value="search" />. The input type in this case is "submit". This tells the form to send the data to the webpage in our action set in the earlier form element. Unlike the name, the value in the code doesn’t need to match the value of the submit button on the Email on Acid website. It simply adds the text to the button.
Finally, we close the form with </form>. The form combines the search keywords and our action together in a URL string:
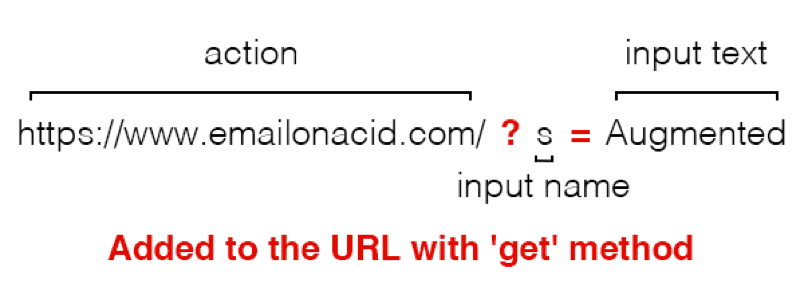
That is everything you need to create a search form in HTML. But to make it function in email and to style it, we get to add a bit more!
Styling the Search Bar
Let’s say I want to match the same style as the search bar on the Email on Acid blog. To do this and to control the position of the search bar, I add a surrounding <td> and more attributes to the input element.
                                <td align="left">
<form method="get" action="https://www.emailonacid.com/blog/">
<input type="text" name="s" placeholder="Web fonts, amp, gifs" style="background-color:
#eeeeee; border: 0; font-size: 16px; line-height: 22px; padding-left: 4px; color: #2d2d2d;
font-family: 'Poppins', Helvetica, Arial, sans-serif;"/>
<input type="submit" id="search" value="search" style="display:none;"/>
</form>
</td>
Attributes
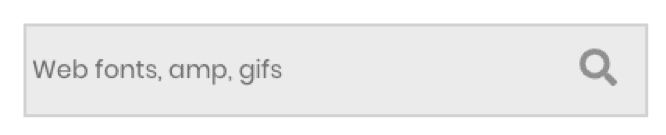
placeholder="Web fonts, amp, gifs" adds placeholder text. Note that neither Gmail nor native Android/Samsung mail clients support this attribute.
You can add any supported CSS inline styles to the input field, such as style="background-color: #eeeeee; border: 0; font-size: 16px; line-height: 22px; padding-left: 4px; color: #2d2d2d; font-family: 'Poppins', Helvetica, Arial, sans-serif;". The font styles also apply to the text a user inputs into the search field. Additionally, input fields have a default border and background-color, so you will need to change those to match your design.
The form and both inputs must be in the same <td> in order for the search to function in Yahoo! & AOL. The separate submit button/search icon that is used on the blog isn’t supported in email, as we need to use <label> to attribute the image to the search input. Anyone who types into the search bar and hits enter or ‘go’ on mobile will still submit the search.
In order to include the Email on Acid search icon in the email and have it functional, we hide the original input with style="display:none;" and give it an id to link the label to the input, id="search".
In our next <td> we set up the search image and label it to link it with the field.
                                <td align="right" style="padding: 0 10px;">
<label for="search" style="cursor: pointer;"><img src="/search.png" width="39" height="39" style="display:block;"></label>
</td>
As for all images, we add any padding to the surrounding <td> then surround the <img> tag with <label> which we link to the input using for="search" and add style="cursor: pointer;" to change the cursor to a pointer when hovering over the search button.
Surrounding this, we add a table with style attributes to match the Email on Acid blog search bar: a dark grey border, grey background and correct proportions.
<table role="presentation" style="width:400px; height: 60px; border: solid 2px #d8d8d8;" width="400" align="center" cellpadding="0" cellspacing="0" bgcolor="#EEEEEE">
Then, we set this in a standalone 100% width table and center it, before wrapping it in a div with class=”hide” and MSO conditional statements to hide it from all Outlooks. The full HTML now looks like this:
                                <!--[if !mso 9]><!-->
<div class="hide">
<table width="100%" align="center" cellpadding="0" cellspacing="0" border="0">
<tr>
<td><table role="presentation" style="width:400px; height: 60px; border: solid 2px #d8d8d8;" width="400" align="center" cellpadding="0" cellspacing="0" bgcolor="#EEEEEE">
<tr>
<td align="left"><form method="get" action="https://www.emailonacid.com/blog/">
<input type="text" name="s" placeholder="Web fonts, amp, gifs" style="background-color: #eeeeee; border: 0; font-size: 16px; line-height: 22px; padding-left: 4px; color: #2d2d2d; font-family: 'Poppins', Helvetica, Arial, sans-serif;"/>
<input type="submit" id="search" value="search" style="display:none;"/>
</form></td>
<td align="right" style="padding: 0 10px;"><label for="search" style="cursor: pointer;"><img src="https://arcdn.net/ActionRocket/Blog-article/search-in-email/search.png" width="39" height="39" style="display:block;"></label></td>
</tr>
</table></td>
</tr>
</table>
</div>
<!--<![endif]-->
Lastly, we need to add a piece of CSS to hide the search bar from Outlook.com clients. It may look a bit different, but to target Outlook.com we need to use the attribute selector square brackets [ ] and add ‘x_’ to the class name in the style. Outlook.com adds these to all classes throughout the email, so we can’t just use .hide to add some CSS to our class=”hide".
                                <style>
[class="x_hide"] {
display: none!important;
overflow: hidden!important;
max-height: none!important;
}
</style>
Fallbacks
With this search working in all clients except Outlook, I usually hide it from Outlook completely without including a fallback. It is an added bit of interactivity that enhances a user’s email experience, but isn’t the focus of the email.
If you do need to add a fallback for Outlook, I have used a gif of a fake search box with a flashing Caret or ‘text cursor’. When a user clicks on it, it takes them to the search page of a site.

Alternatively, simply add a call to action with the word ‘Search’. To do this, you just need to wrap the table in MSO conditional statements to only be shown in Outlook.
                                <!--[if mso | ie]>
*Fallback content*
<![endif]-->
Code Your Own Search Bars in Email
Find all the code on Codepen to start experimenting with search bars in your emails!
If you’ve tried this or something similar in the past, share your experience with us in the comments. We love learning from other email marketers and developers to find out how you’re pushing the email envelope.