We make it easy to add and manage users on your account. Each account type has a set number of free users, but an account administrator can add additional seats within the People section of their account.
- The Basics
- One user at no additional cost.
- Premium
- Three users at no additional cost.
- Enterprise
- 10+ users / Custom
There are three user types you can add to your account:
- Administrator
- Has the ability to create, edit and delete projects. Can create, edit, and delete folders. Can add, edit, or remove users. Can make additional seat purchases on an account.
- General
- Has the ability to create, edit and delete projects. Can create, edit, and delete folders. Can see but not add or edit other users.
- Read-Only
- Has the ability to view projects, but not run tests or make edits. Can see but not add or edit other users. Read-only users are free and can be added to any account without taking a paid seat.
Note: An Administrator on Enterprise accounts can create custom user permissions and assign users to specific folders.
To add a new user:
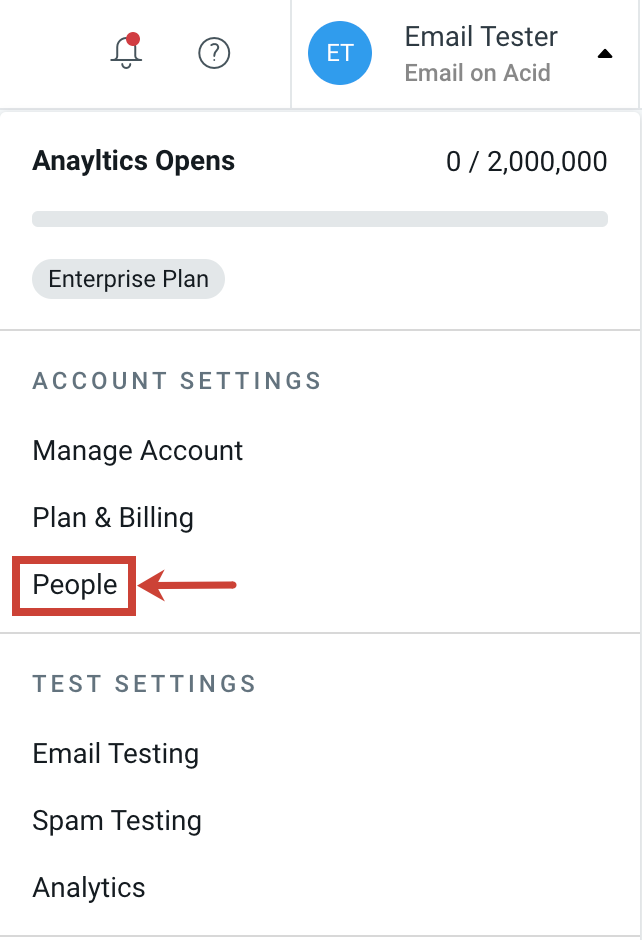
1. Click on the Username on the upper right of the page, and click People
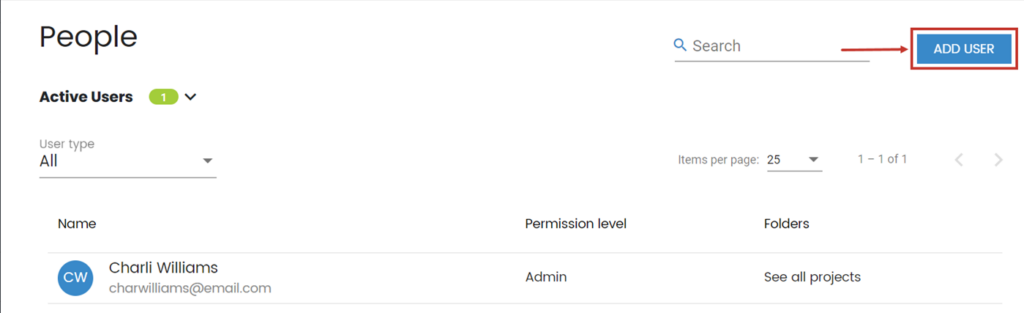
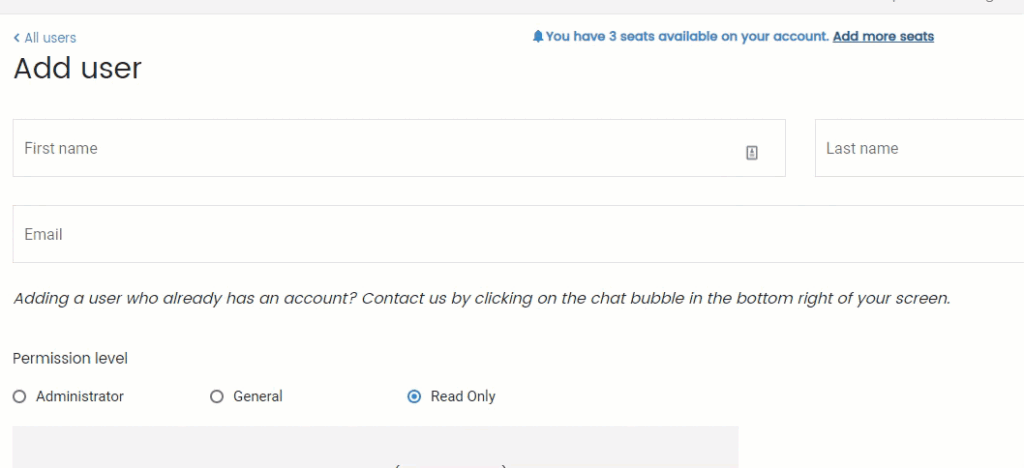
2. Click Add User
3. If you have enough seats (users) available, or are adding a read-only user, you will enter the First Name, Last Name, Email, Permission type, and project visibility pending user type. Then click
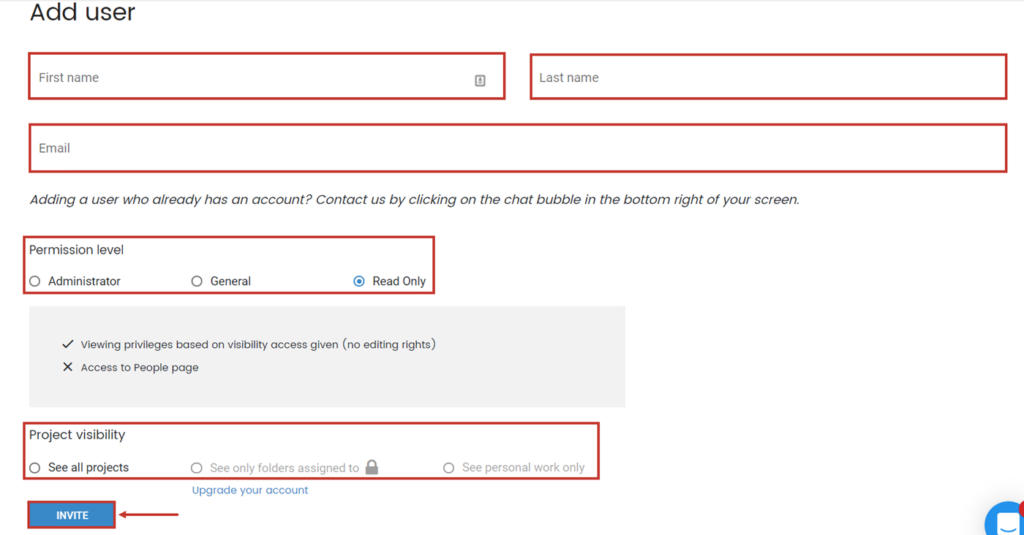
4. If you need to add additional seats (users) to your account, you can do so if you have a credit card on file. Click on Add More Seats , and complete the additional seat sign-up. If you do not have a credit card on file, contact helpdesk@emailonacid.com for support. Once you have added the needed seats, you can then follow step 3 to add the user.
Once the user has been added they will receive an invite via email. They will set up their username and password, and immediately be able to log in. If for any reason the user does not receive an invite, click here for steps on how to provide the registration link directly. If you receive an error that the user already exists, click here to learn how to resolve this.
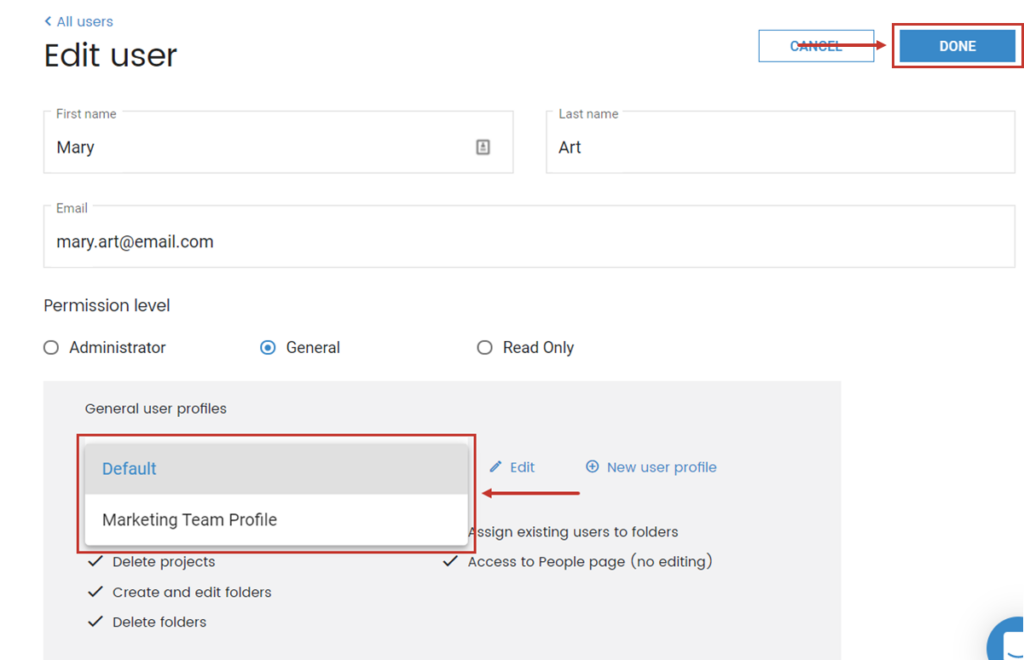
Custom User Profiles
Enterprise customers can set up custom user profiles to manage the permissions of each user. If this is a feature you need for your team, click here to learn how to upgrade. To create a custom profile:
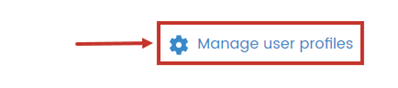
1. Click on Manage user profiles.
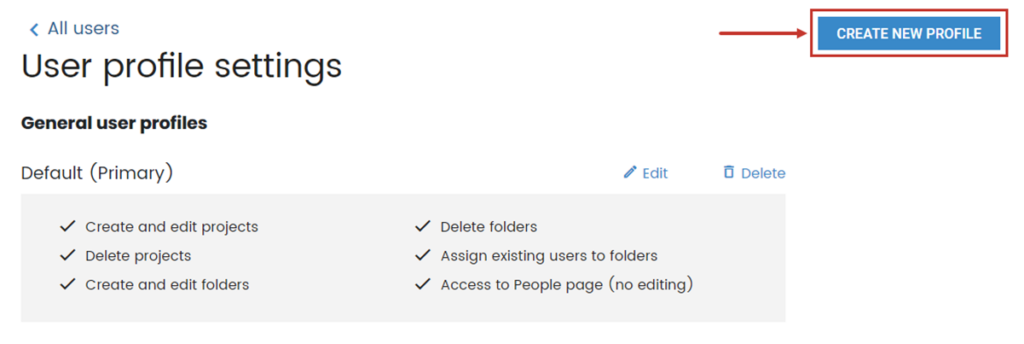
2. Click Create New Profile.
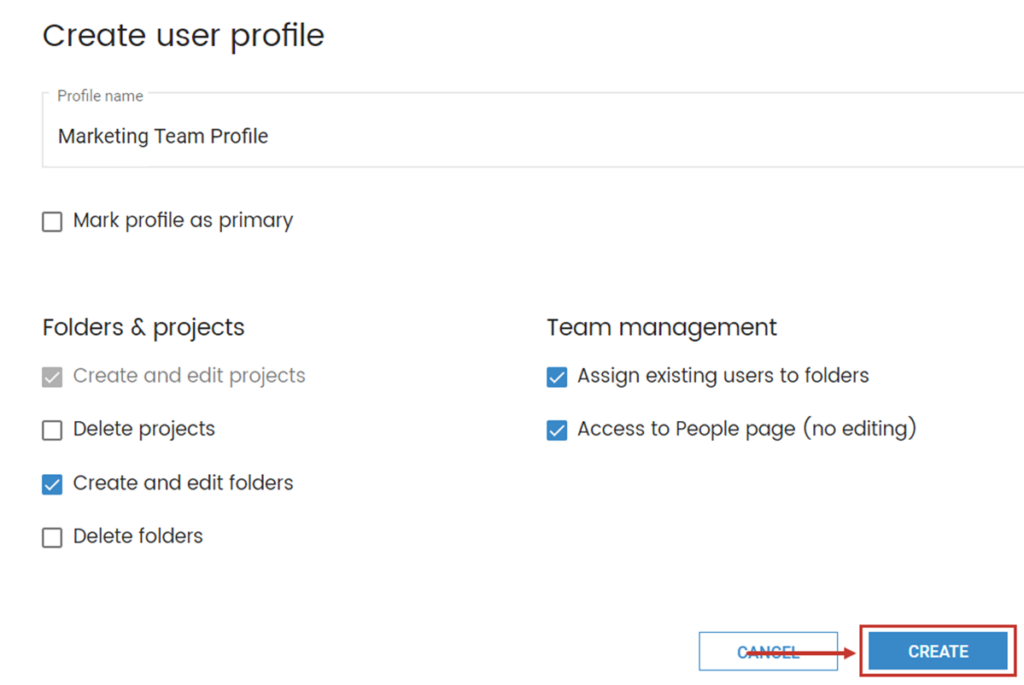
3. Create the profile name, and choose the permission, then click Create.
You can now assign the new profile to your user. Click on the user profile under General User Profiles, chose the custom profile from the drop-down. Then click Done . The user will just need to log out, and back in, and they will have the updated permissions.