Help Article
How to Use and Manage Folders
Folders are a great way to organize content, and depending on your account type, organize who can see which content. Each account type has a different level of folder access, see our pricing to see what level of your account type offers. If your account does not have the tool you need to work with your team, learn how to upgrade your subscription here.
Creating Folders
1. To start building your folders, click Projects from the navigation pane.

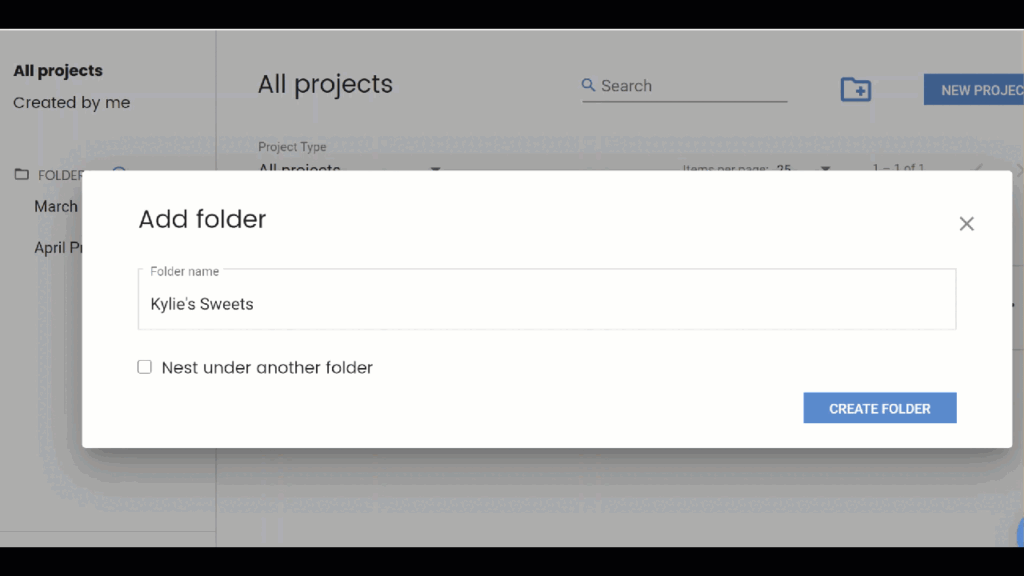
2. Click on the circled plus sign next to Folders, or click on the folder with plus sign

3. Type in the folder name, and click Create Folder. You will notice that once you have built one folder, you can nest sub-folders within. For example, you may have a folder for each months’ work, and add sub-folders for projects within those month folders by clicking the check box next to Nest under another folder.
Once a folder is created you can access it by clicking on the folder name to the right. Once in the folder, click on the three dots at the top or the right to add a subfolder, rename, move or delete the folder.

Moving Projects to Folders
Moving projects to folders is easy. Click on the circle in front of the project or click on the three dots to the right of the project, then click Move. Select the folder and click Move Project.

Professional and Enterprise accounts can assign users to folders.